Step-by-Step guide to install Read-Only Domain Controller (RODC)
Now let’s dive into the step-by-step guide. To create a dump of the AD Forest we will use ntdsutil. Did you know that originally Active Directory Domain Services was called New Technology Directory Services? Thus the ntds in ntdsutil.
Before you proceed
Before you proceed with the Install From Media (IFM) method, you will need to know some basic things.
- The IFM method, obviously, can not be used for the first Domain Controller of a forest but for adding an extra DC
- The media file should be created by a DC from the same AD domain
- If the new DC will be a Global Catalog (GC) server, then the media file should be created by a DC which is also a GC server
- If the new DC will be a DNS server, the media file should be created by a DC with a DNS role installed
- If you deploy an RODC, you can create the media from either a writable DC or an existing RODC
- The IFM method creates a temporary database in the% TMP% folder, so make sure there is enough available space on the folder location
Installing RODC using the Install From Media (IFM) method
As you may have already understood, the process is done in two basic steps, first in an existing Domain Controller from where we will create the media file and second in the new DC or RODC that will import the file we created when installing Active Directory.
In the existing Domain Controller
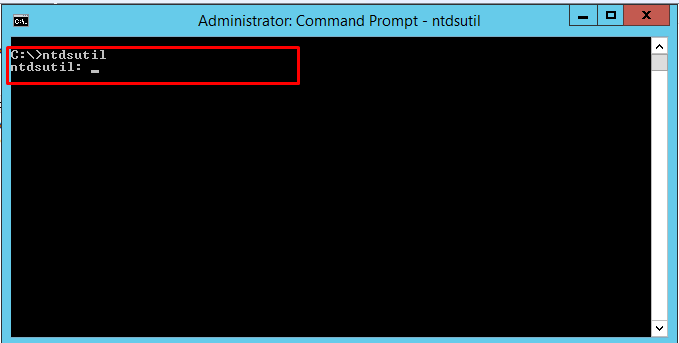
1. Log on to DC01, as windowstechno\administrator, then open the Command Prompt, type NTDSUTIL and press Enter.
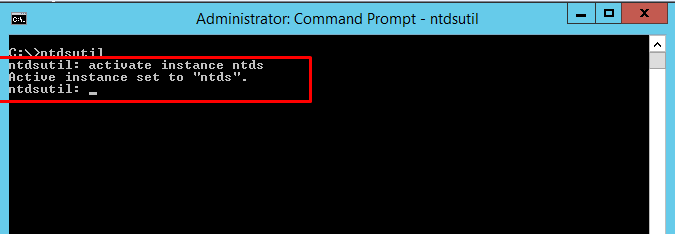
2. At the ntdsutil prompt, type Active instance NTDS and then press Enter.
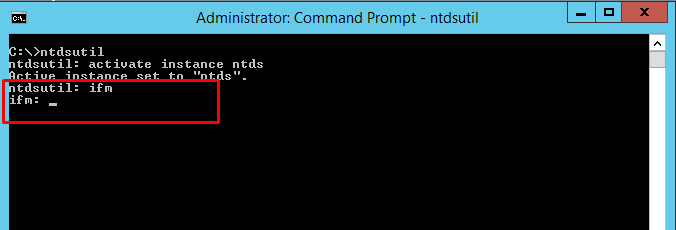
2. At the ntdsutil prompt, type ifm and then press Enter.
3. At the ifm prompt, type create sysvol full C:\ifm
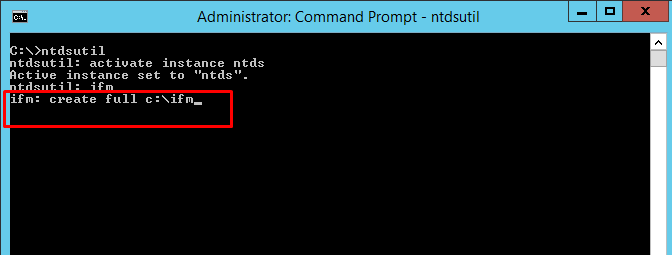
and then press Enter.
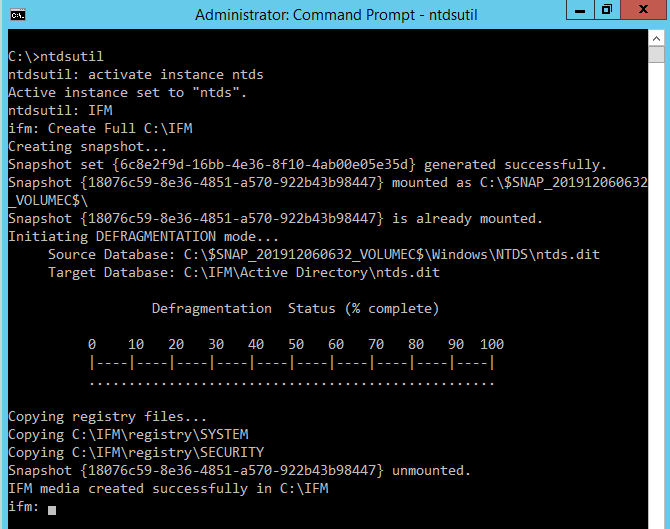
4. Type, quit, quit.
Open the IFM folder to confirm that the file is there.
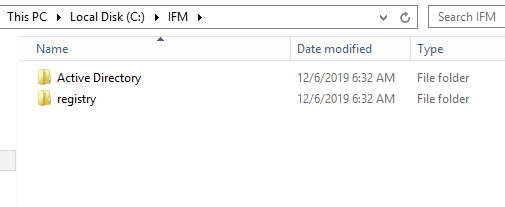
Next, make sure you share the IFM folder so that the other remote server can access to ADDS server and copy IFM server from the ADDS Server to remote side server…
In the newly build server that we are going to be promoted as RODC
First, install the Active Directory Domain Services role either through Server Manager or PowerShell. I will not mention the same procedure here because there is already a detailed guide to that procedure.
Also, for the same reason, I will only refer to the point where you declare the folder and not specifically to the process of promoting the server to a Domain Controller. I remind you that you will need to enable Add a domain controller to an existing domain as the new DC should be in the same domain from where you created the file.
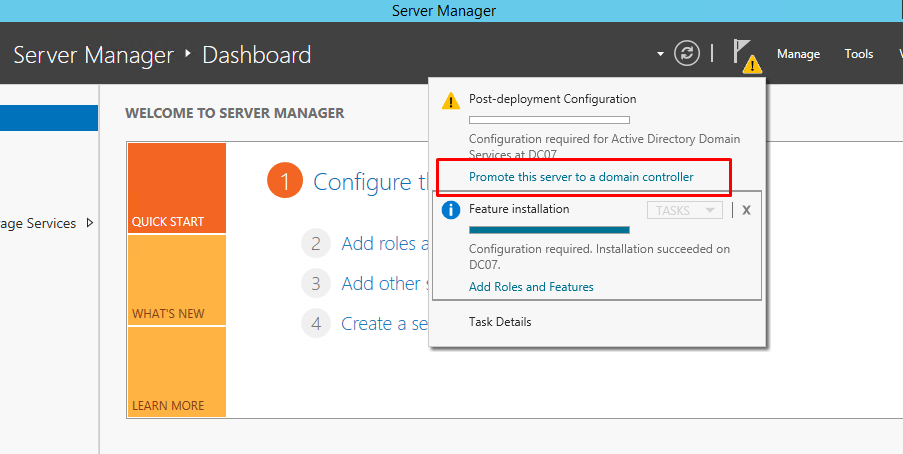
Once ADDS installed please open the server manager and Select the yellow notifications icon in the top navigation bar of the Server Manager window.
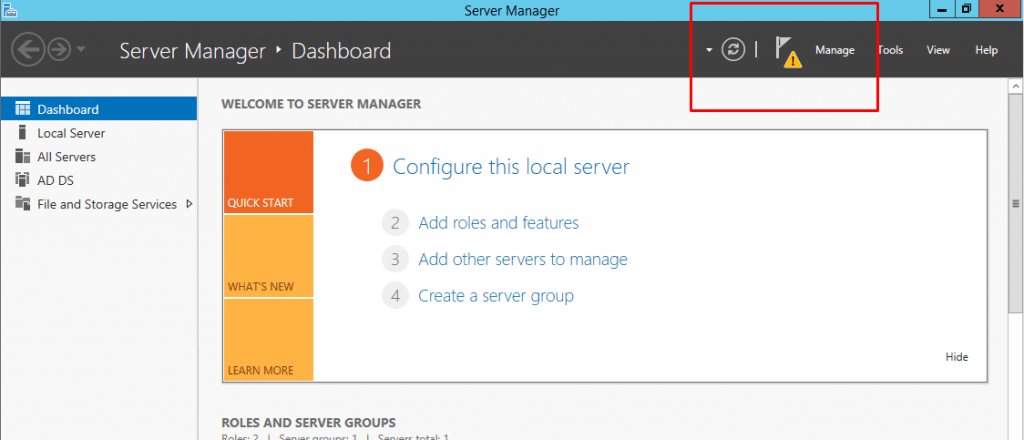
The Notifications Pane opens and displays a Post-deployment Configuration notification. Click the Promote this server to a domain controller link that appears in the notification.
Click on Add a domain controller to an existing domain and type the domain name as “Windowstechno.local”
Enter the domain admin credentials to promote this server.
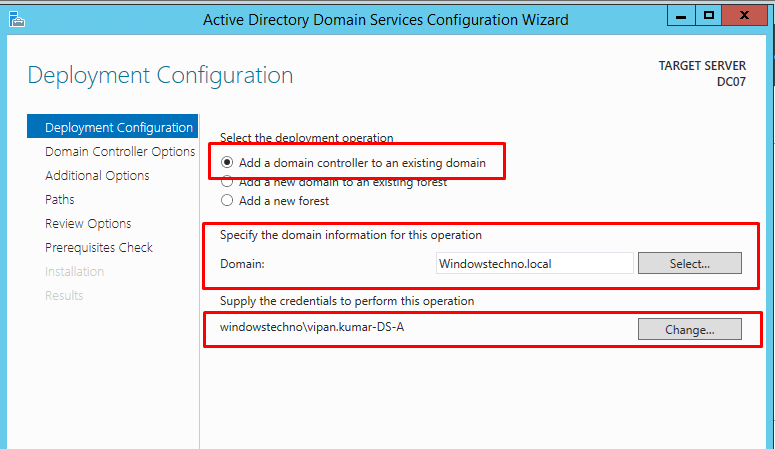
Click on next button.
On the Domain Controller Options select DNS or GC and Read only domain controller during this installation, As we are installing the RODC in existing domain infrastructure. Enter a desired DSRM Password and click on next.
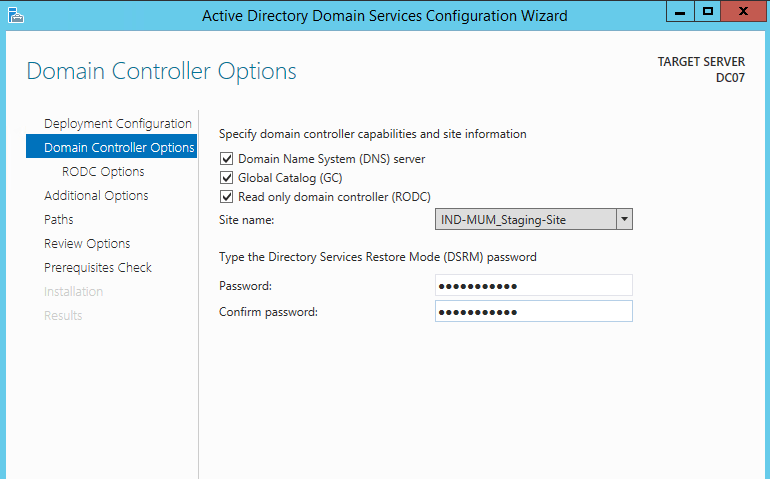
Note: If the domain controller located in a different site, the site name would have been pre-selected for that site if defined in ADDS. Here we are select the IND-MUM_Staging-Site.in upcoming post, we will explain about staging site.
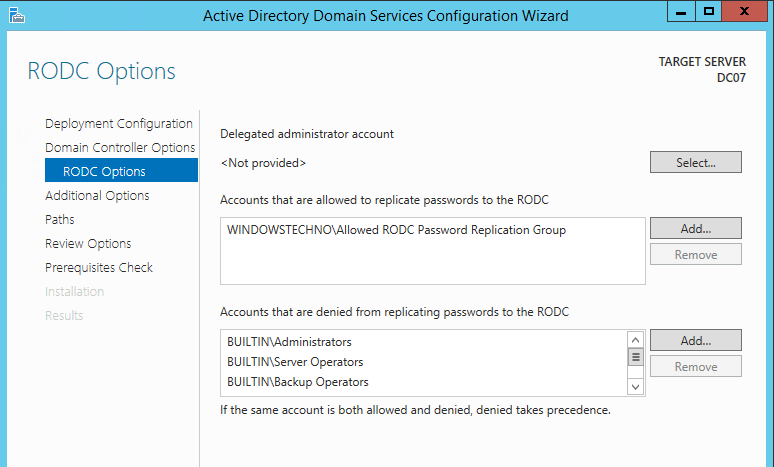
On this RODC Options screen, we can delegated administrators account who can manage the RODC and also configure which accounts or groups are allowed to have their passwords replicated to the RODC.
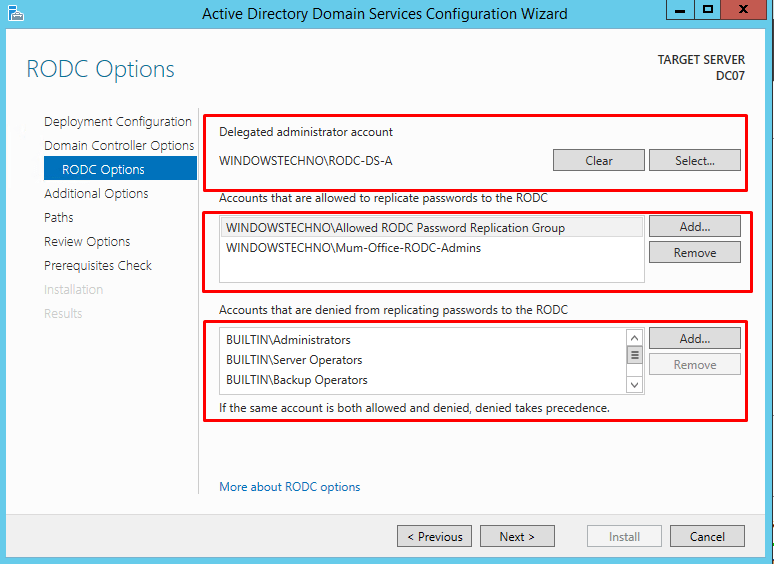
In above snapshot, We have added the RODC-DS-A account for RODC administration and also added the group that contain the Mumbai office administrators in password replication option.
Click on next button.
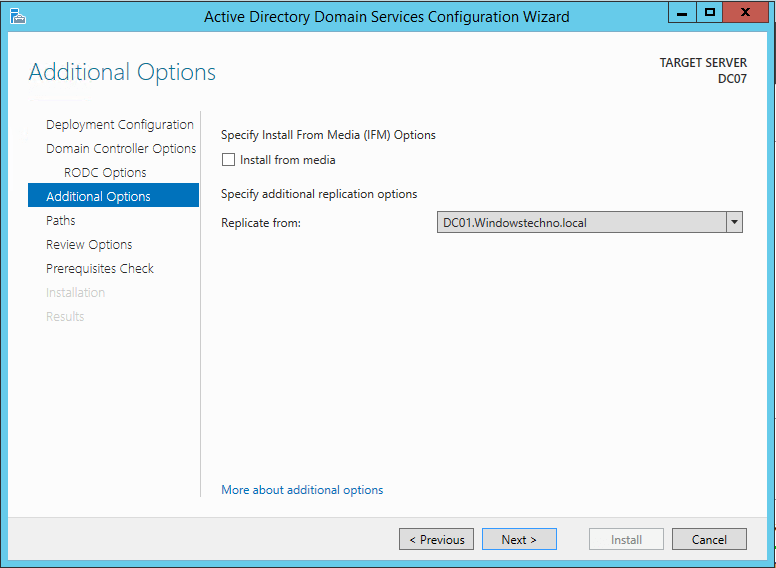
In this window we can define from which DC we need replication done. Here we have selected the DC01 for replication.
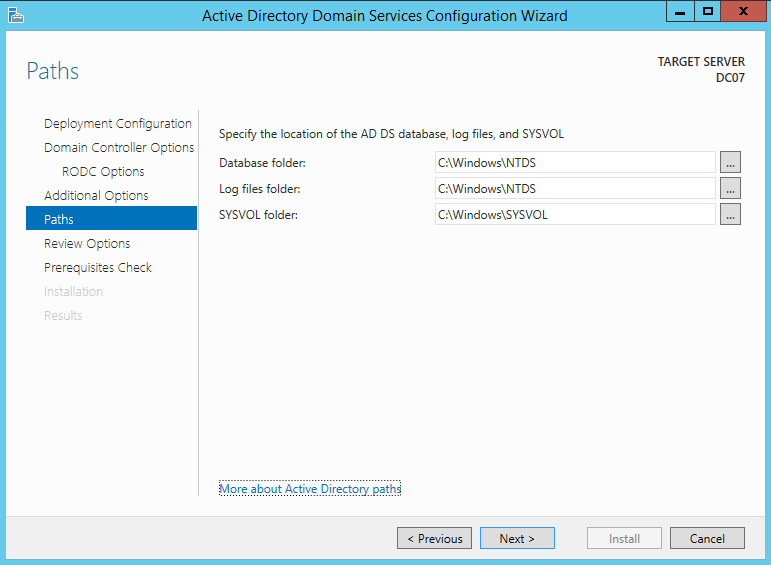
In next window it gives option to change the folder paths. in here we keep default. click next to continue.
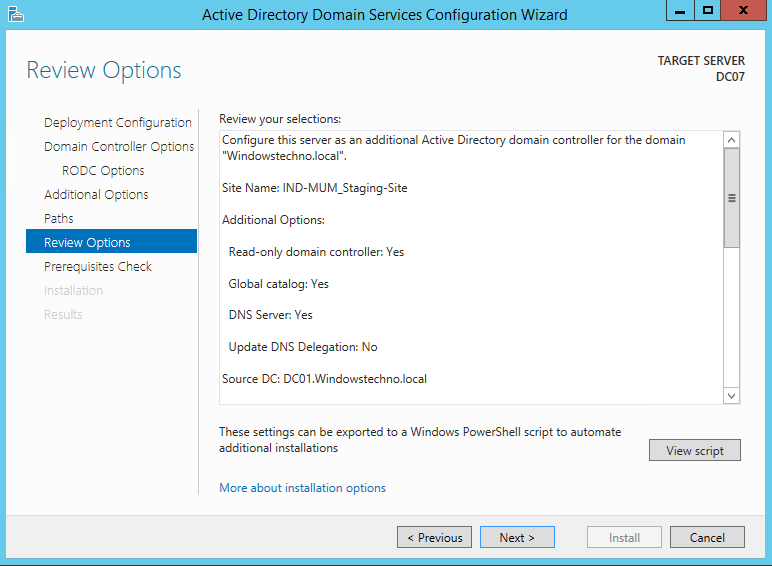
In next window it gives option to review the installation selection and click next to continue
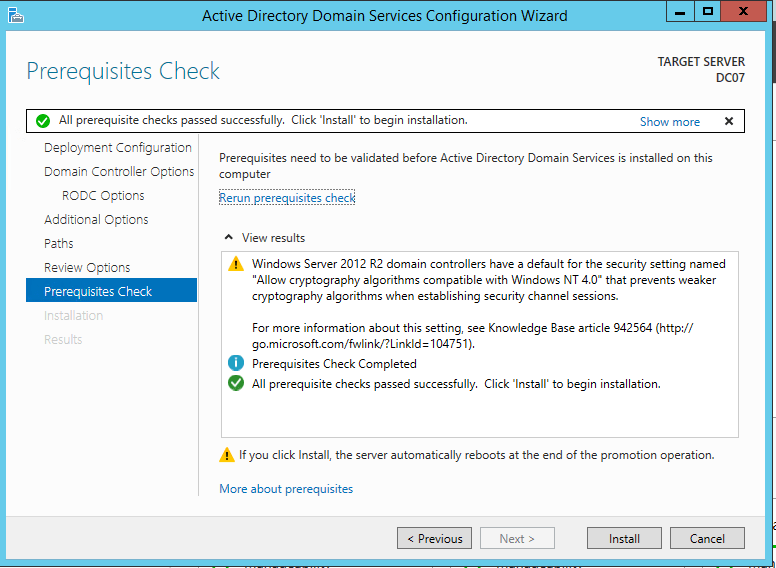
In next window system will check if its meet all the prerequisites for the installation. click on Install to begin the installation
Click on next button
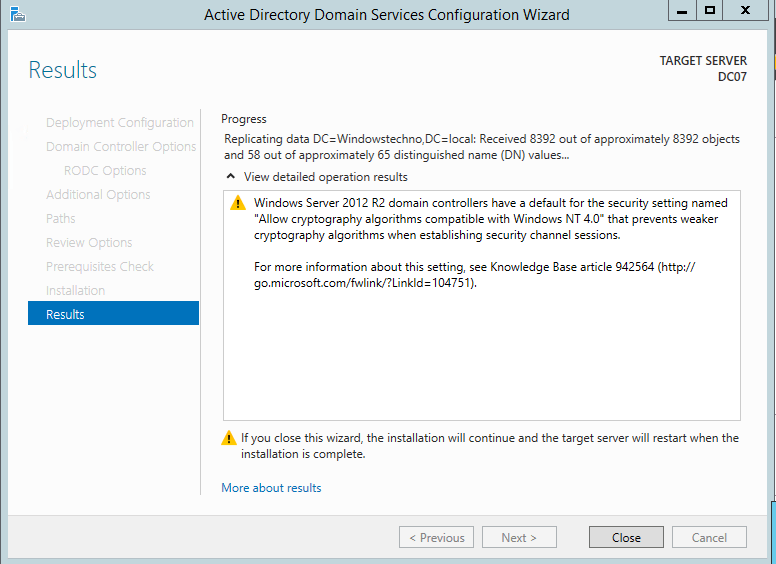
Once installation done system will automatically reboot.
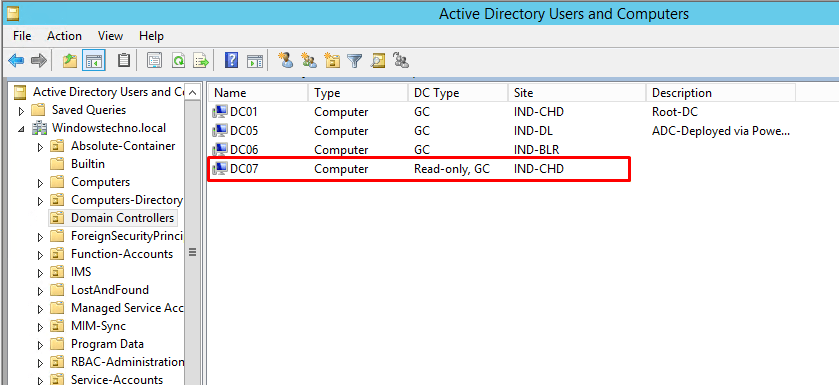
After reboot, Please login to RODC and open the active directory users and computers console to see the RODC object.
So, that’s all in this blog. I will meet you soon with next stuff that will be based on same SRV records information but will be in detailed. Have a nice day !!!
Recommended content
RODC Installation Guide- Step by step guide to install read only domain controller
RODC Filtered Attribute Set
Installing and configuring a RODC in Windows Server-2012
How to find the GUID of Domain Controller
Understanding Group Policy Preferences
Group Policy Verification Tool GPOTool Exe
Group Policy Health Check on Specific Domain Controller
Netlogon Folder in Active Directory
Custom Attributes in Active Directory
Tombstone Lifetime of My Active Directory Forest
Computers AD Site From the Command Line
Active Directory Database Integrity
Disabling and Enabling the Outbound Replication
DFS Replication Service Stopped Replication
Strict Replication Consistency
The replication operation failed because of a schema mismatch between the servers involved
Troubleshooting ad replication error 8418 the replication operation failed because of a schema mismatch between the servers
Replication information in txt file
Repadmin Replsummary
Enabling the outbound replication
Guys please don’t forget to like and share the post.Also join our WindowsTechno Community and where you can post your queries/doubts and our experts will address them .
You can also share the feedback on below windows techno email id.
If you have any questions feel free to contact us on admin@windowstechno.com also follow us on facebook@windowstechno to get updates about new blog posts.