Hello All,
Hope this post finds you in good health and spirit.
This post is regarding how to Export a GPO to a File in AGPM Console.
You can export a controlled Group Policy object (GPO) to a CAB file so that you can copy it to a domain in another forest and import the GPO into Advanced Group Policy Management (AGPM) in that domain. For information about how to import GPO settings into a new or existing GPO, A user account with the Editor or AGPM Administrator (Full Control) role or necessary permissions in Advanced Group Policy Management (AGPM) is required to complete this procedure.
To export a GPO to a file
- In the Group Policy Management Console tree, click Change Control in the forest and domain in which you want to manage GPOs.
- On the Contents tab, click the Controlled tab to display the controlled GPOs.
- Right-click the GPO, and then click Export to.


- Enter a file name for the file to which you want to export the GPO.
- and then click Export. If the file does not exist, it is created. If it already exists, it is replaced.

Further considerations
- To carry out this operation, you must by default be an Editor or an AGPM Administrator (Full Control). You specifically need to have the GPO’s List Contents, Read Settings, and Export GPO permissions.
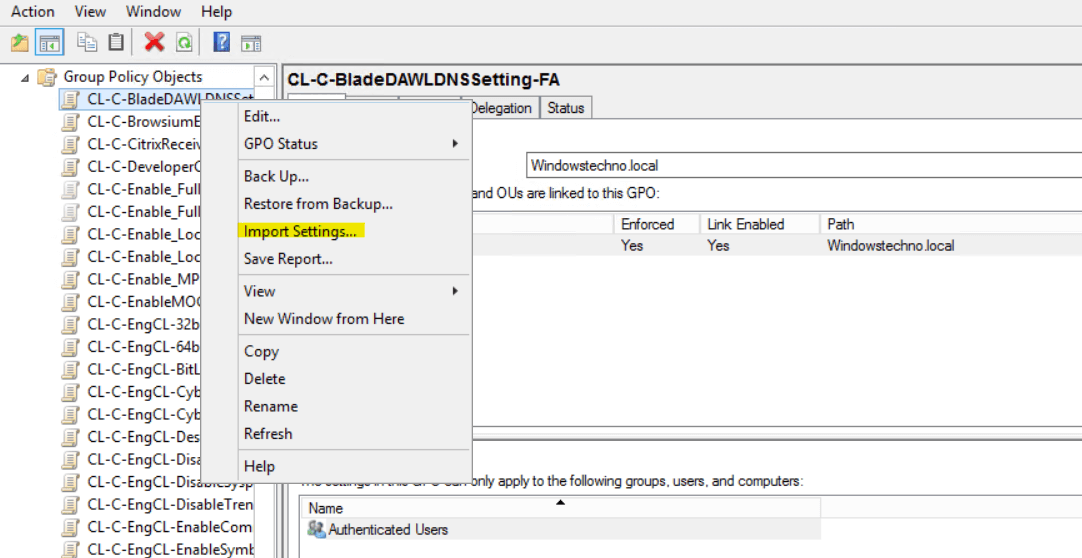
To import policy settings into an existing GPO
-
In the Group Policy Management Console tree, click Change Control in the domain to which you want to import policy settings.
-
On the Contents tab, click the Controlled tab to display the controlled GPOs.
-
Check out the destination GPO to which you want to import policy settings.
-
Right-click the destination GPO, point to Import from, and then click File.
-
Follow the instructions in the Import Settings Wizard to select a GPO backup, import its policy settings to replace those in the destination GPO, and enter a comment for the audit trail of the destination GPO. By default, the destination GPO is checked in when the wizard is finished.
Exporting GPO from Active Directory
- In the Group Policy Management Console tree, click Change Control in the forest and domain in which you want to manage GPOs.
- On the Contents tab, click the group policy tab to display all GPOs.
- Right-click the GPO, and then click backup.
- Browse the location and enter a name for the backup to which you want to take the GPO backup, and then click backup.
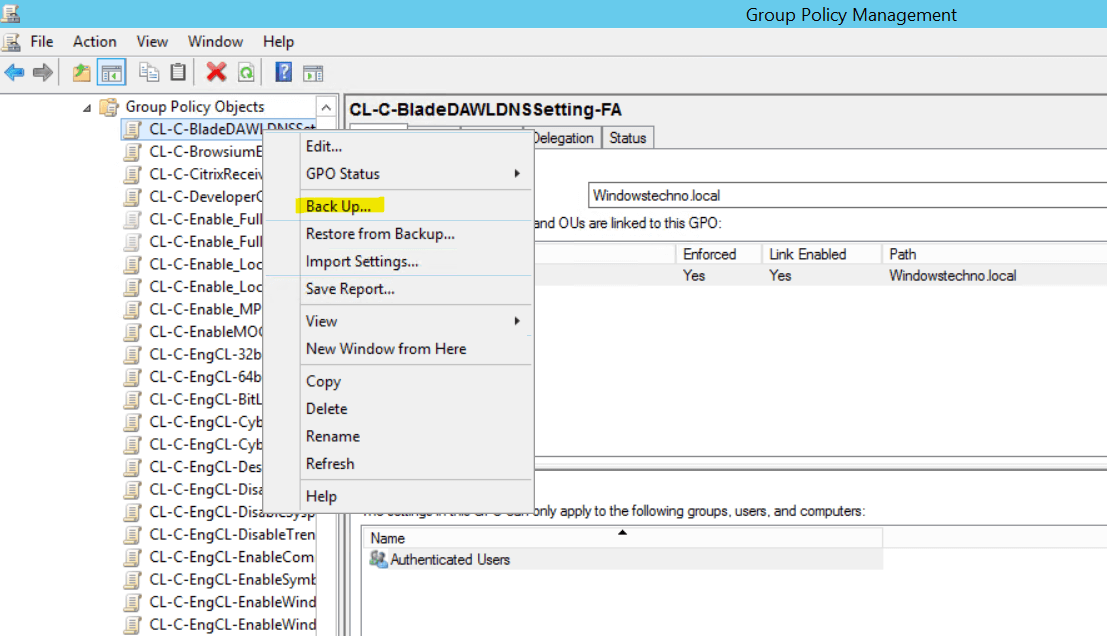
5. The Backup window will show the progress. When the backup operation is complete, click OK.
6. Now create a new GPO and import GPO settings.
FAQs
- Open PowerShell as an Administrator on a computer that has RSAT install or having ADDS role.
- Run the following code to export the GPO information to a CSV file. You can change the path as needed: “Get-GPO -All | Export-Csv -Path “C:\AllGPOs.csv -NoTypeInformation”
- Open cmd.exe.
- In the command window type the following command: gpresult /h filename.html and hit Enter.
- Log on machine using Administrator.
- Open CMD (run as administrator).
- Type gpresult /r or gpresult /h C:\gpo. html and click Enter.
- Check which Group policy is applied to this machine by opening C:\gpo. html and checking “Computer Details”.
Guys please don’t forget to like and share the post. Also join our WindowsTechno Community and where you can post your queries/doubts and our experts will address them.
You can also share the feedback on below windows techno email id.
If you have any questions feel free to contact us on admin@windowstechno.com also follow us on facebook@windowstechno to get updates about new blog posts.