Step-by-step Guide to Install SSL Certificate on Windows Server (IIS 10)
SSL Certificate installation
Step-by-step Guide to Install SSL Certificate on Windows Server (IIS 10)
Keeping your website safe is crucial for business. That is because a compromised website can lead to financial problems – from lost business to data breaches putting customers’ personal information at risk. From man-in-the-middle attacks to ransomware, cyber attacks cause data breaches leading to a lack of trust among customers for the brand.
Fortunately, operating systems like Windows have actively secured experiences through features like Smart Screen. It protects users’ devices from malicious websites, applications, and software. For example, windows Smart Screen lists pre-defined certificates; if your apps and websites do not have matching certificates installed, it can flag users.
So, SSL certificate becomes essential for your websites and applications. In this piece of information, we will reveal about to install SSL certificate on Windows (IIS-10). SSL certificates help secure communication between the browser and server.
Getting a digital certificate from a trusted certificate authority (CA) also ensures that Windows Smart Screen does not flag your software. However, when you purchase SSL certificate; you need to install it on the server to ensure website protection.
This article will show you how to install SSL certificate on IIS 10. Ready to protect your business? Let us get started!
Steps to Install SSL Certificate on Server (IIS 10)
SSL certificate installation in IIS 10 requires a file with a .cer or .p7b extension. You can either download the certificate issued by CA through an email or from the issuer’s official website. Getting the certificate requires the submission of a signing request. You need to complete the configuration process and submit required documents to CA; the CA verifies it and issues the certificate.
Step 1 Upload the certificate.
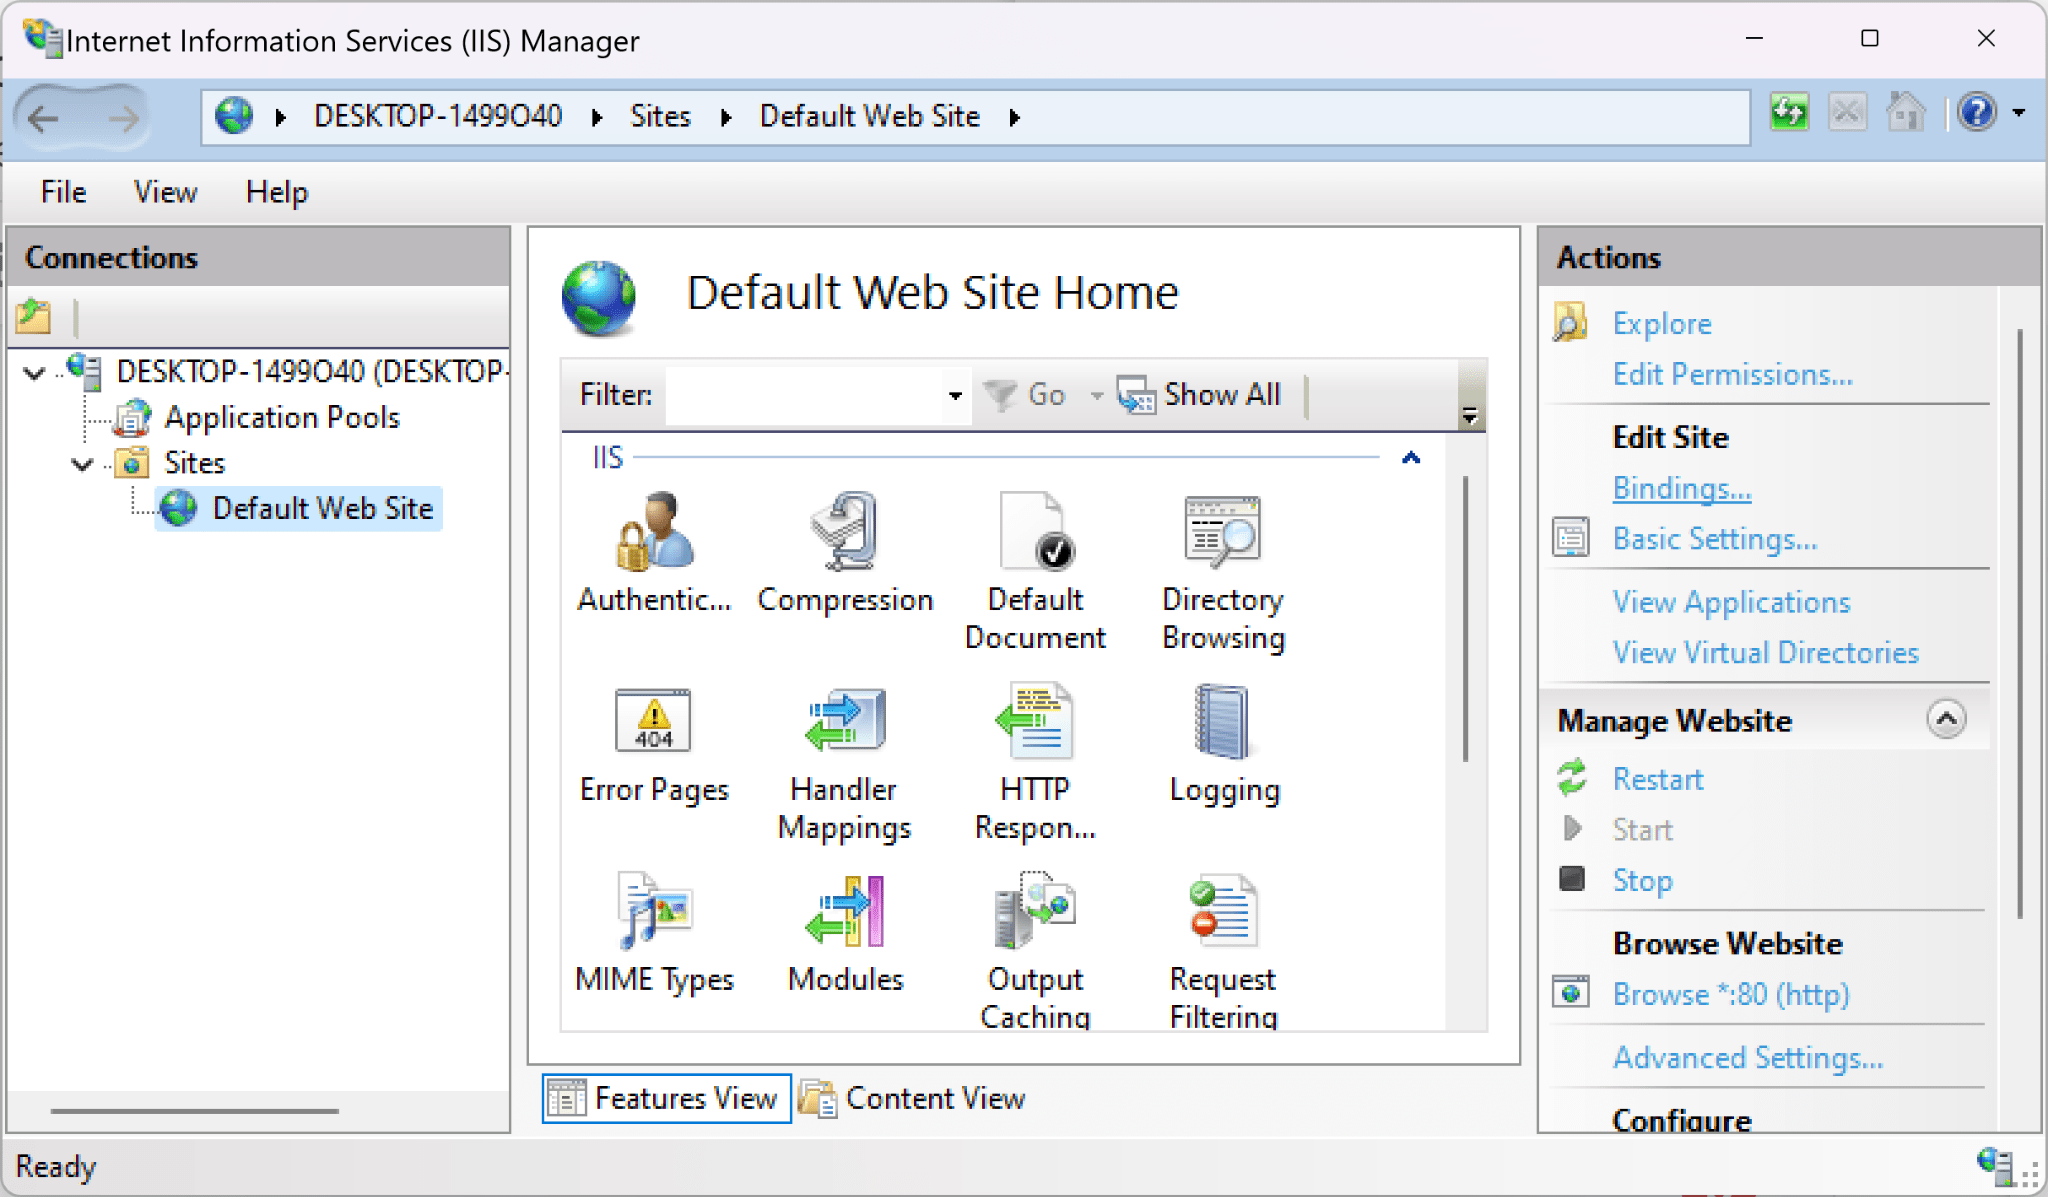
The first step to installing an SSL certificate on Windows is to run Internet Information Services Manager.
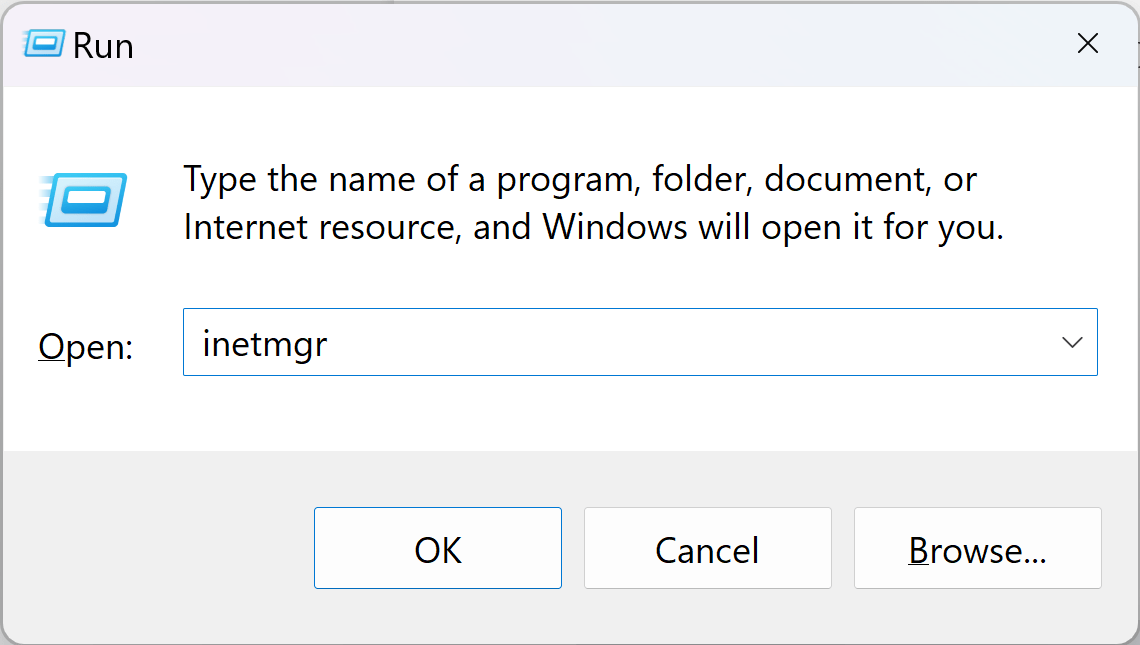
First, press the Windows key and R on your keyboard to open the IIS manager. Further, type ‘inetmgr’ in the window that appeared after you press Win + R! Once you click on ‘OK’, a new window will open, which will be the home page for the IIS manager.

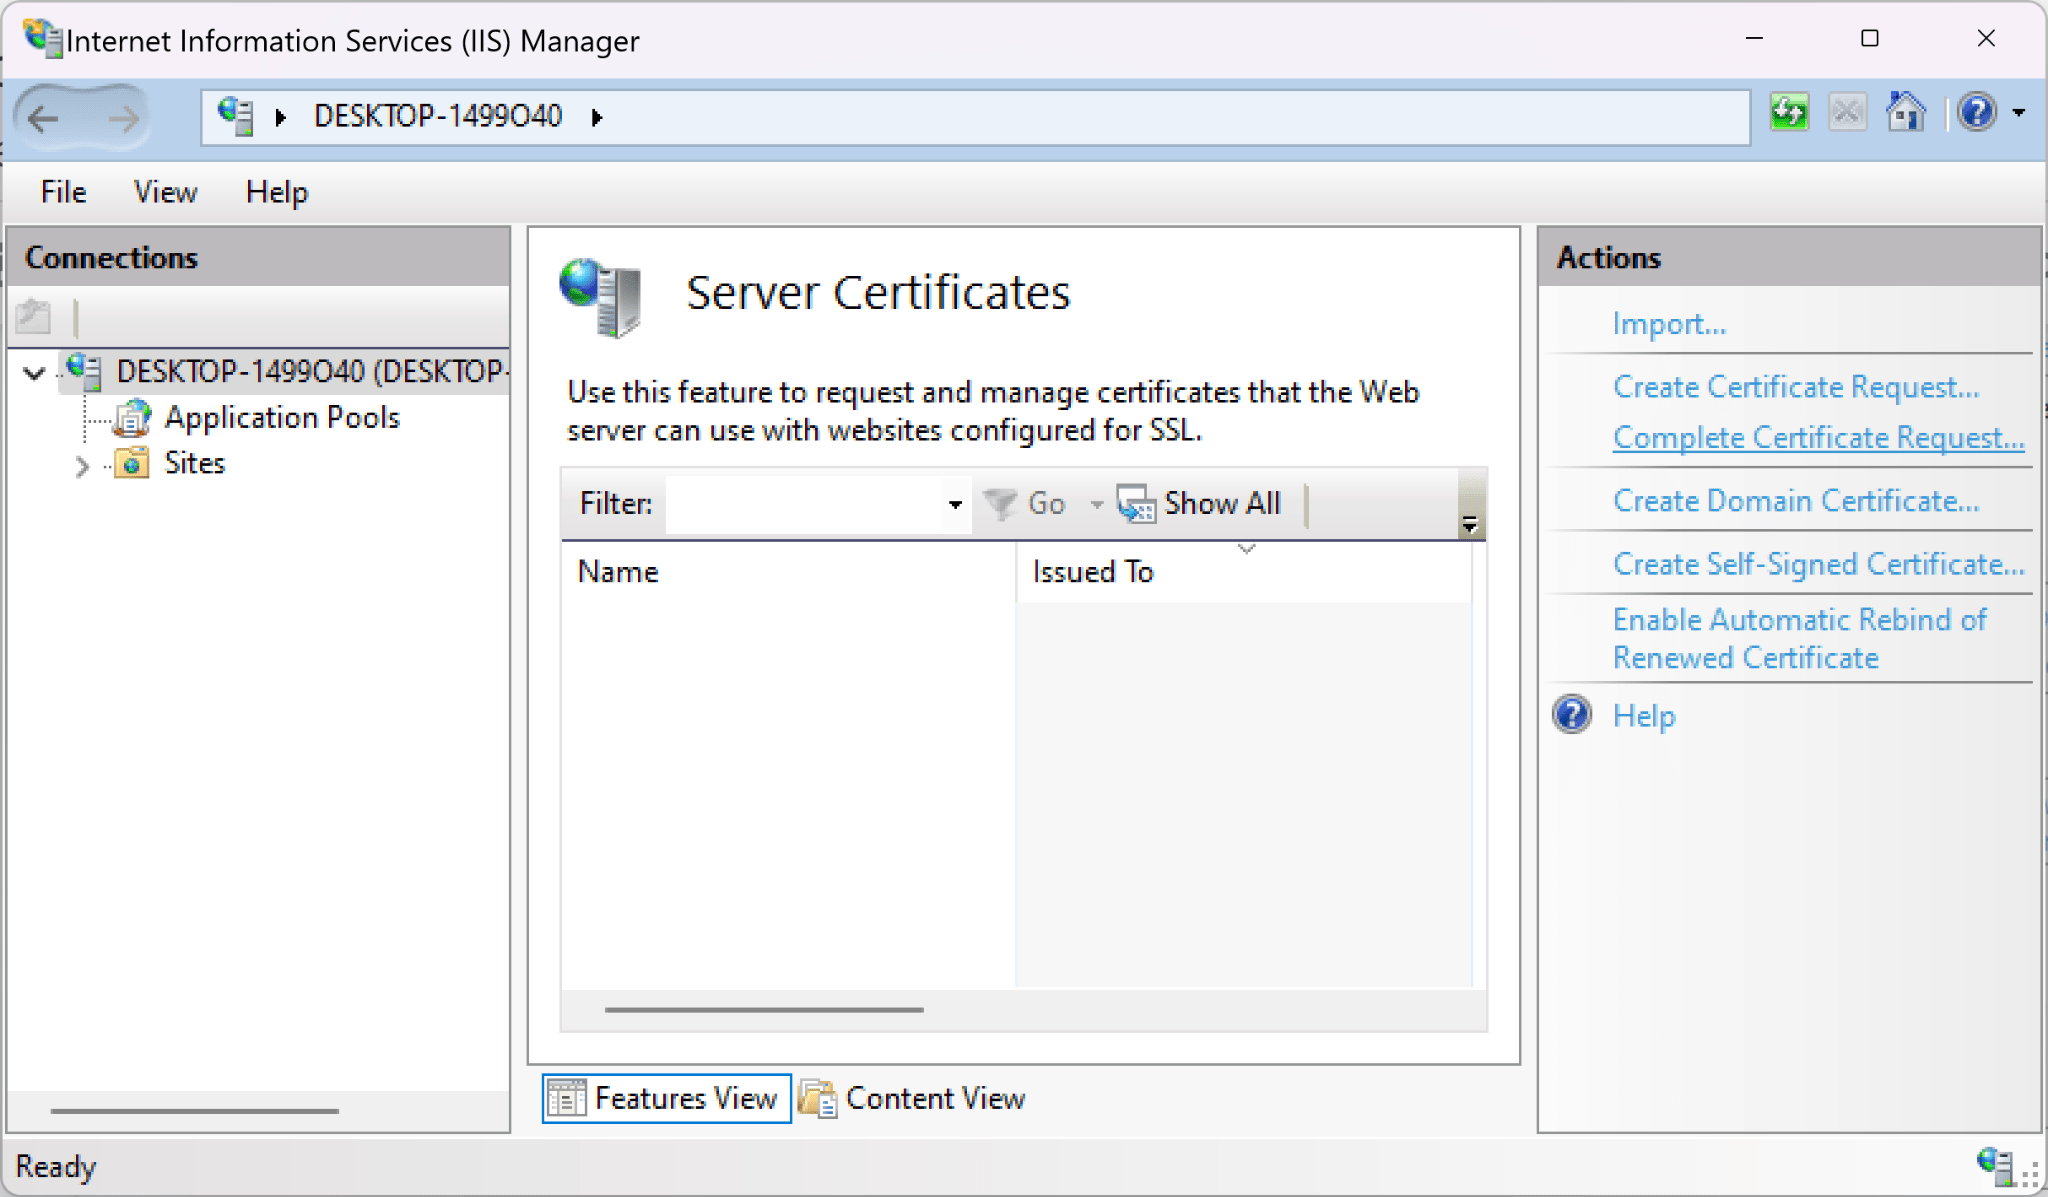
Step 2 Find server certificates.
Find the server certificates option on the IIS manager home page and double-click to open it.
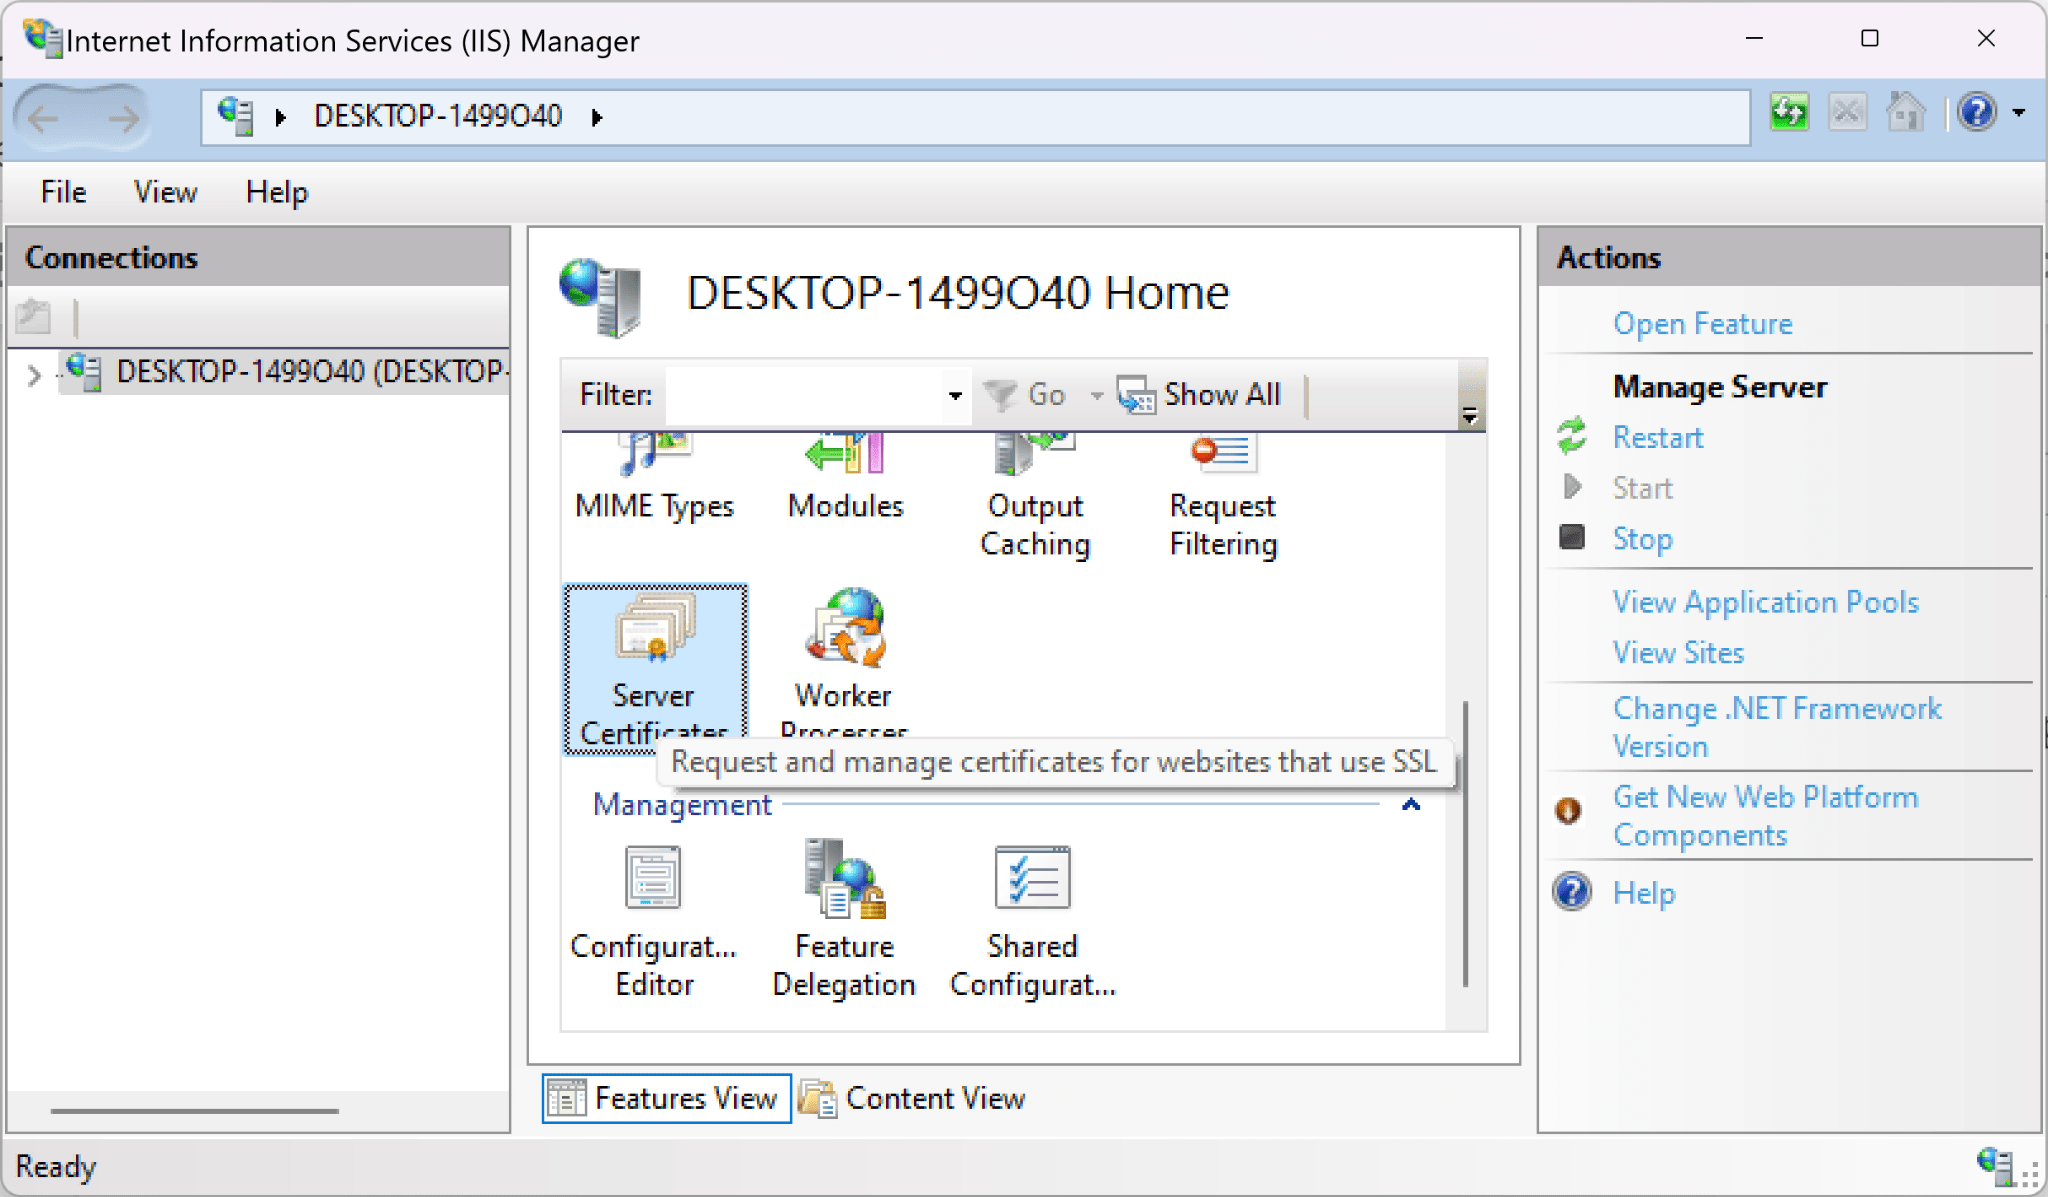
Find Actions on the right-hand panel of the home page and select the option of the complete certificate request.
Step 3 Specify the SSL certificate file
Specify the path to your certificate file, which you downloaded from the email sent by CA.
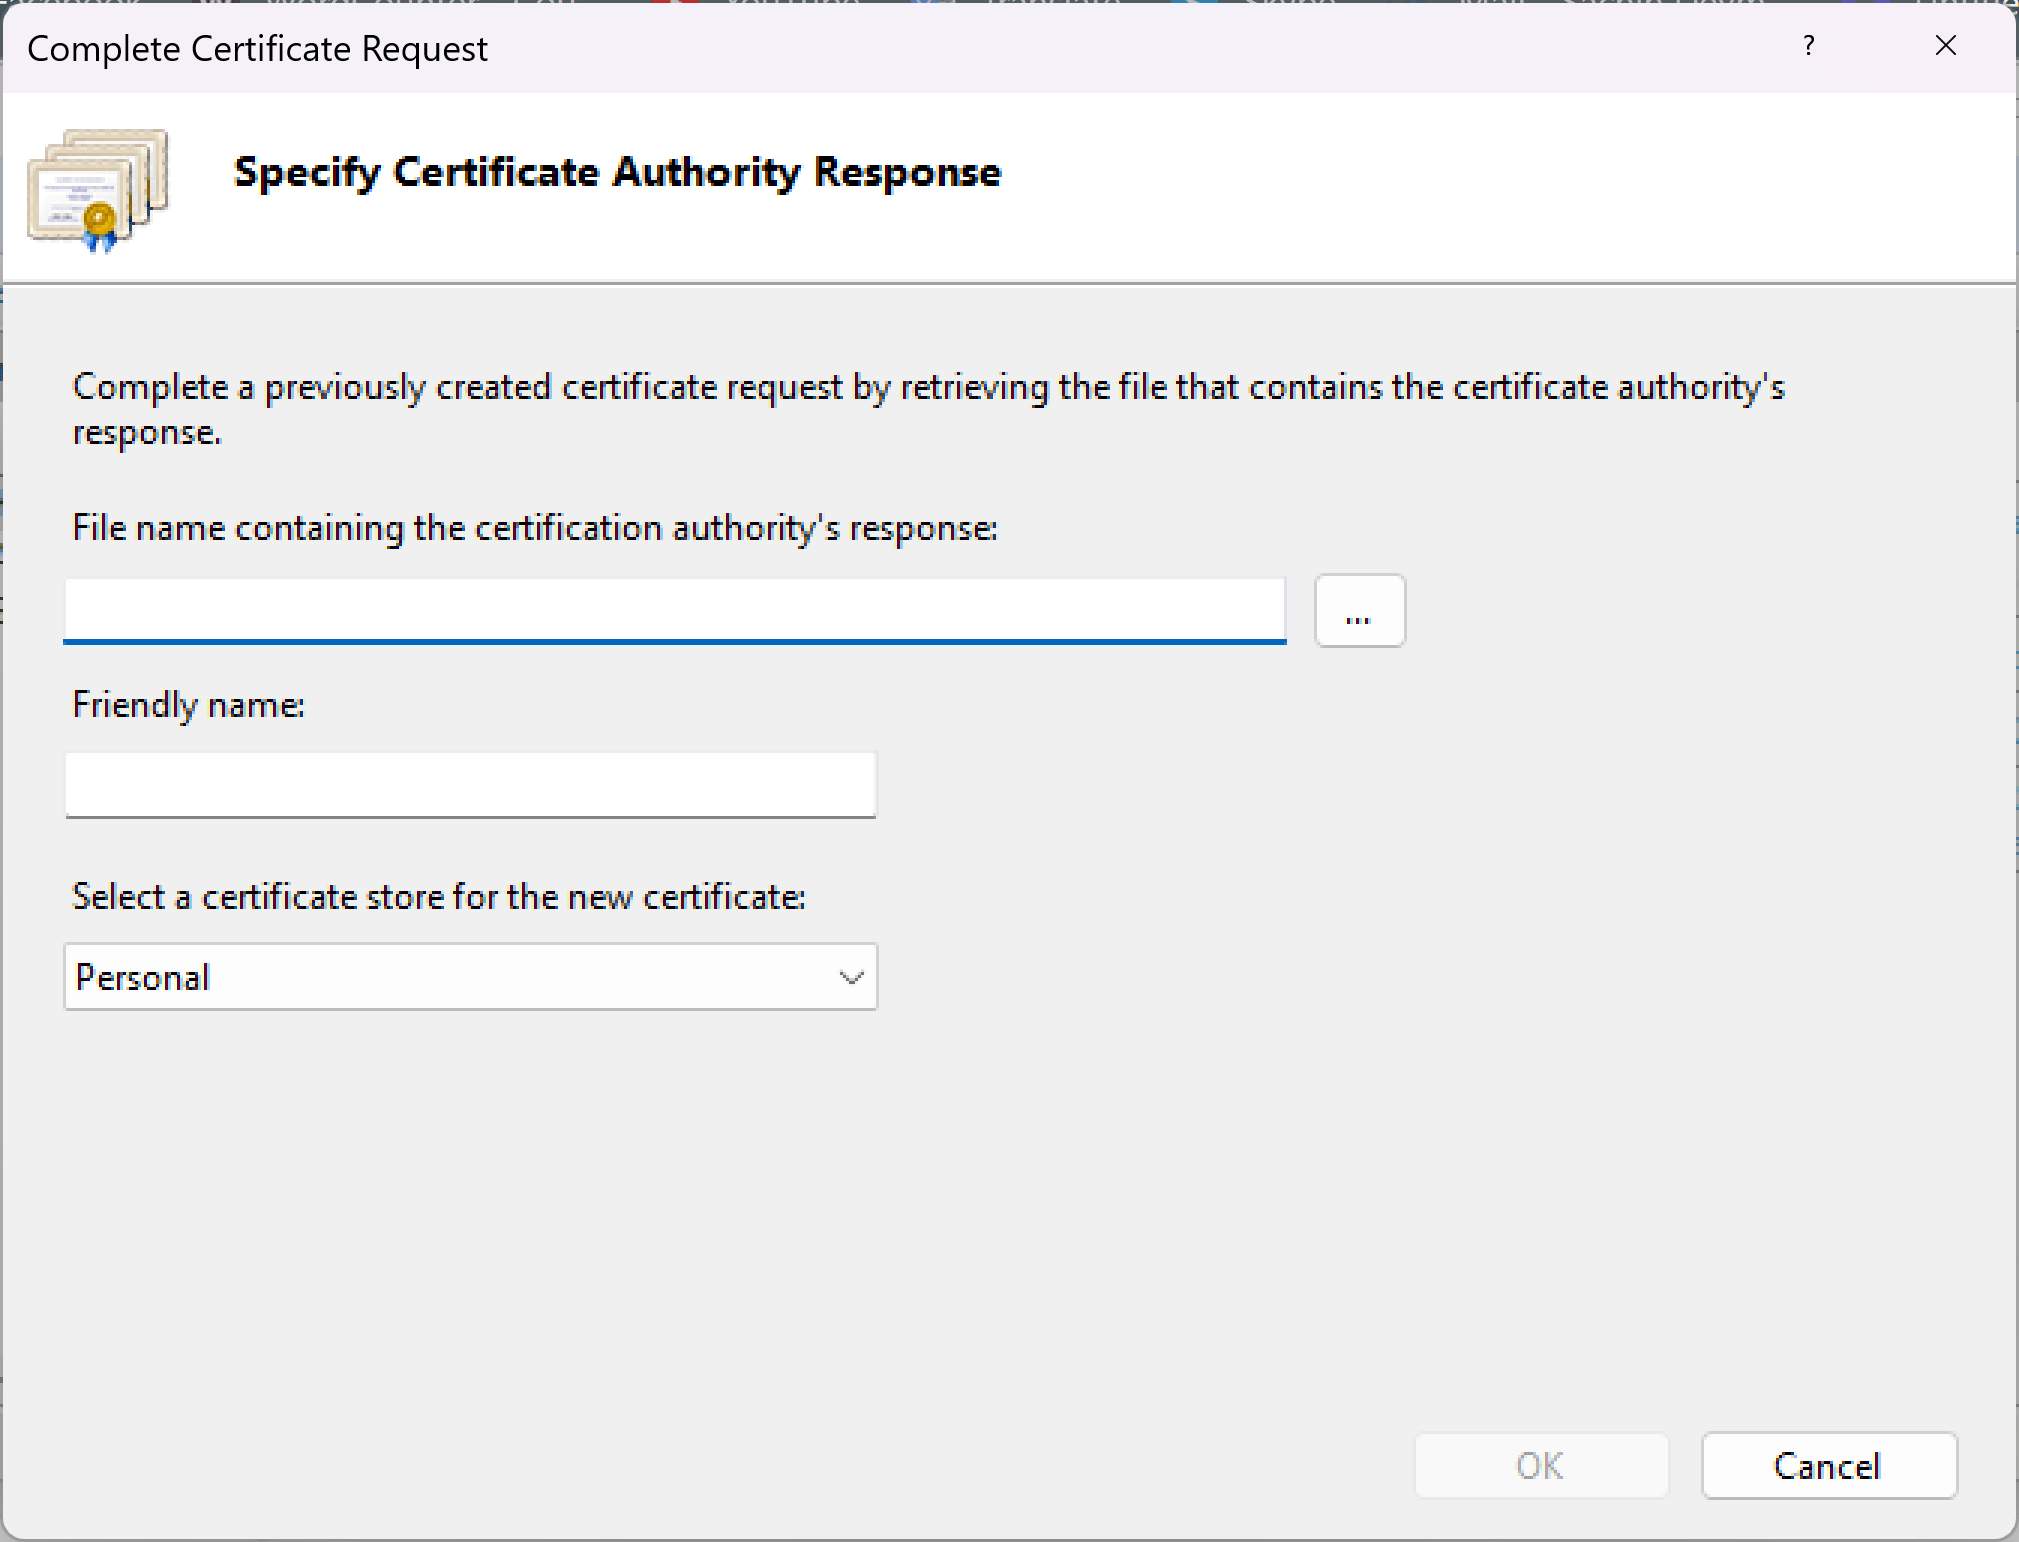
Browse files in the system to select the SSL certificate. Further, add a friendly name and specify a name that allows you to differentiate your certificate from other files. Next, select the certificate store where you want to store new certificates. It is recommended to keep the default value for the certificate store, ‘ Personal.’

Find the .p7b file on your device and change the file name field per the certificate extension. Next, click on open, and once the certificate is ready for upload, click OK. The SSL certificate is now installed, and you can bind it to the website or IP address.
Step 4 Binding IIS 10 server with the certificate.
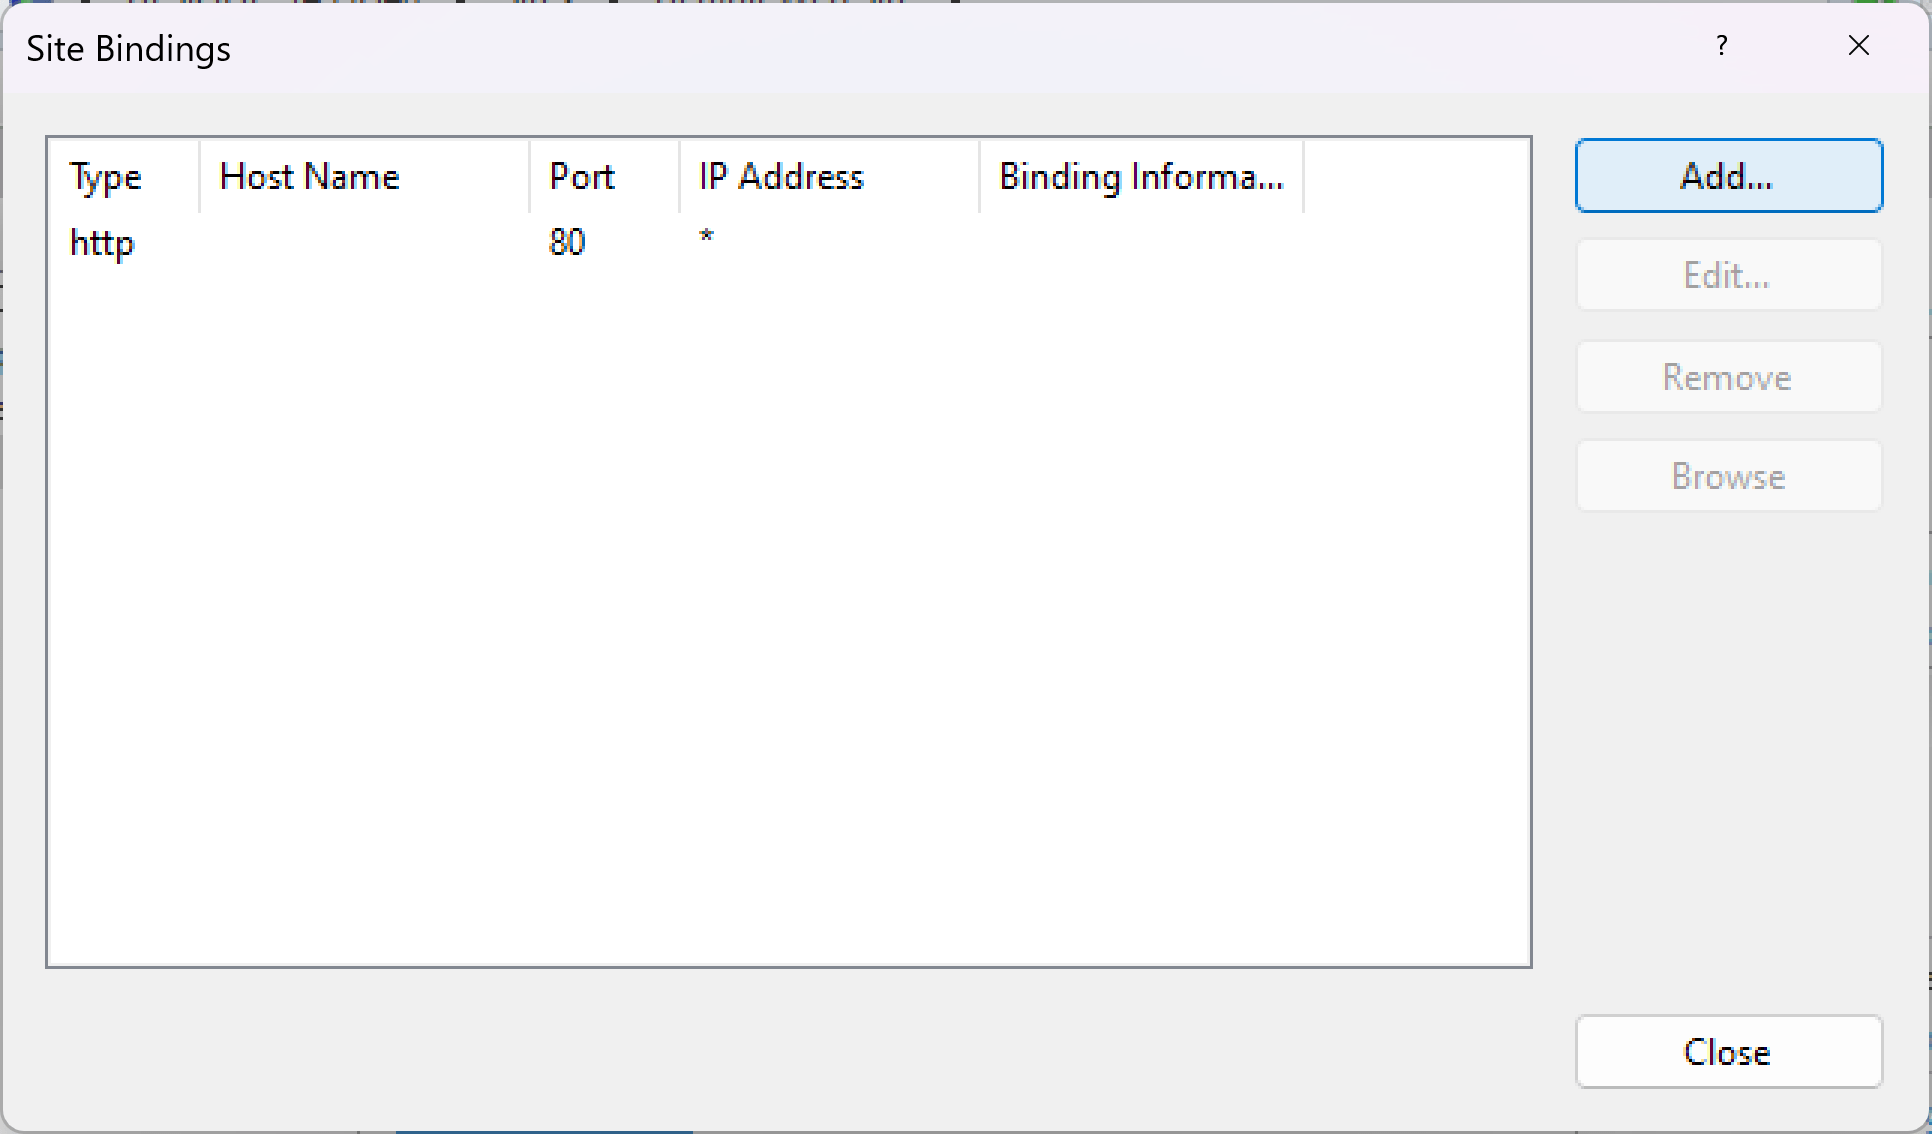
The process of binding begins by revisiting the IIS manager on your machine. Go to the main home page of the IIS manager and look for the ‘Action’ panel on the right-hand side. You will find the option for binding the certificate to your website.
Now click on ‘Add’, and a new wizard will open.
Step 5 Add site binding
Now, fill in the details in the wizard. For example, the binding type selects HTTPS instead of HTTP. Keep the IP address to ‘All Unassigned’ and port as 443. Next, you can select the SSL certificate that you want to bind to the website through the select option.
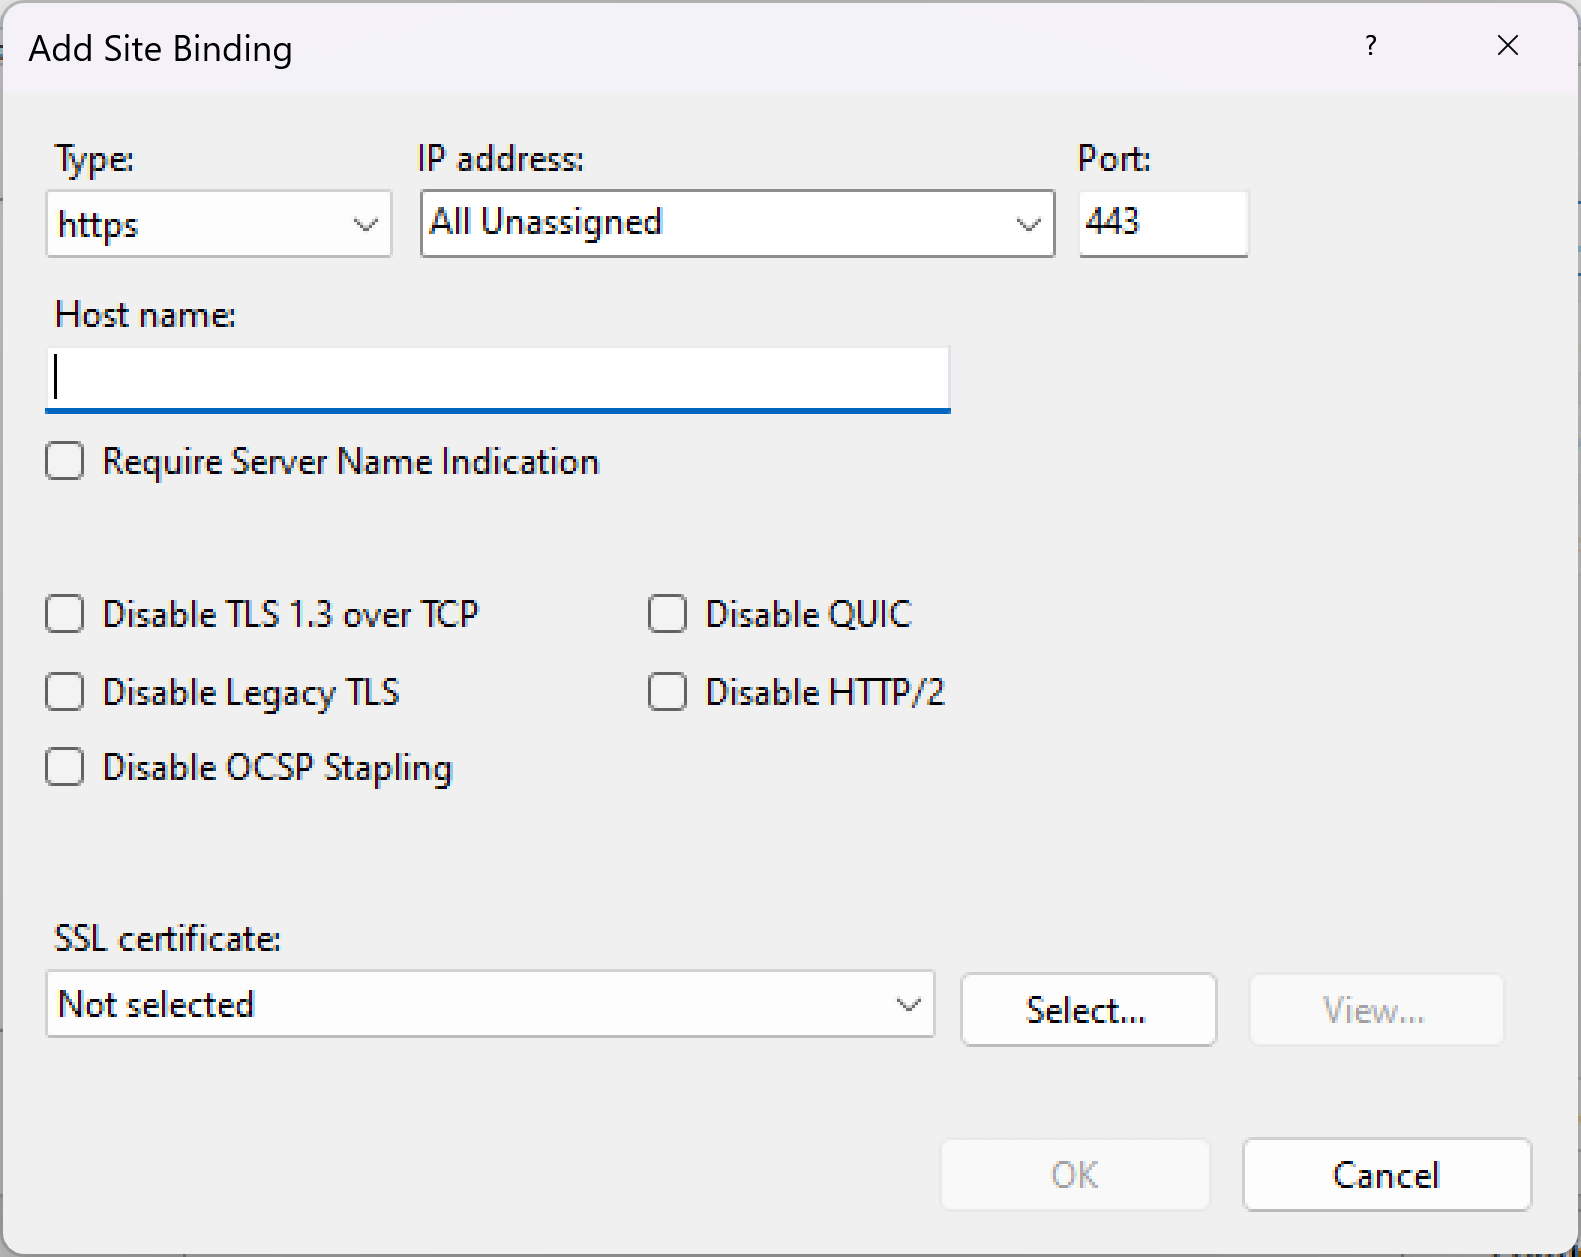
You can click on the select and search for the certificate if there is more than one installed on the Windows Server IIS 10.

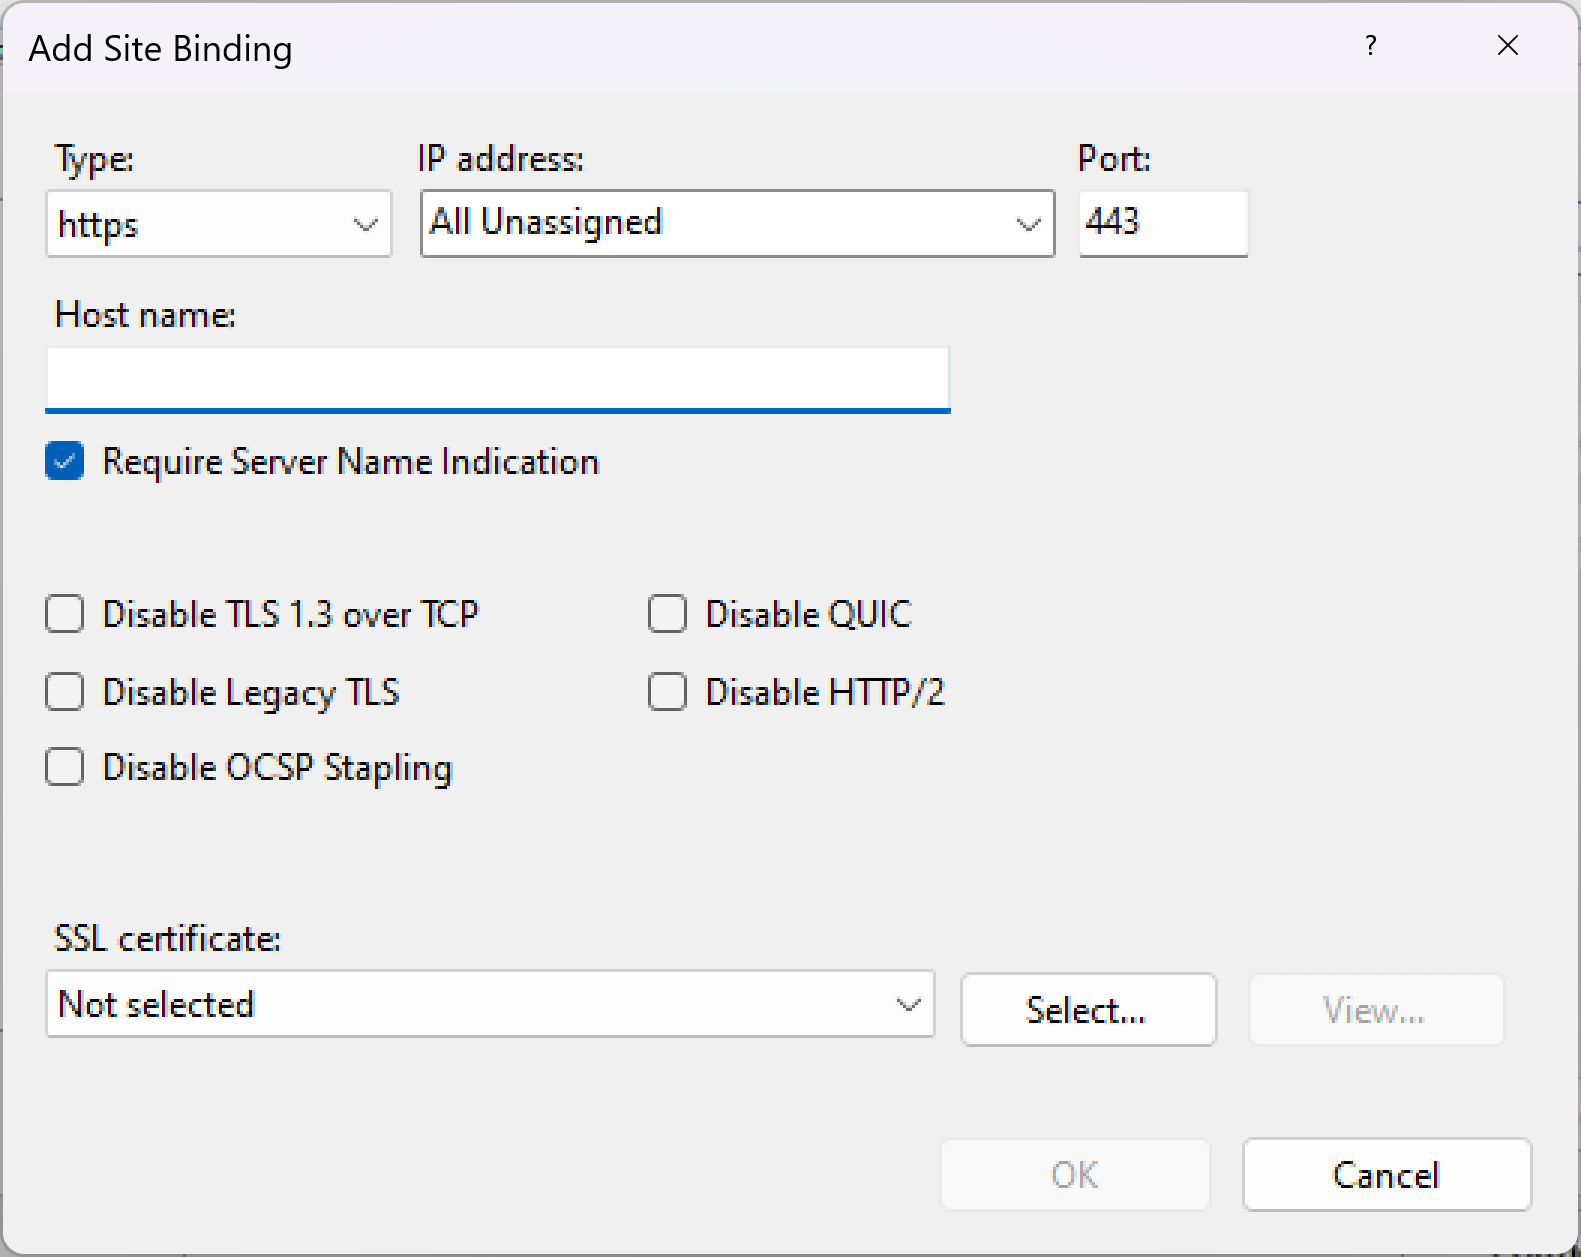
If you have multiple domains for SSL certificate binding, you need to click on the checkbox for SNI or Server Name Indication with a hostname.
Conclusion
Increasing cybersecurity threats requires advanced measures and making the purchase of SSL certificates a practical decision. However, it is not just about making the purchase; installation on the Windows server is also essential. So, follow the steps discussed here and install the certificate to secure your websites.
So, that’s all in this blog. I will meet you soon with next stuff .Have a nice day !!!
Recommended content
How to Check the Active Directory Database Integrity
Disabling and Enabling the Outbound Replication
DFS Replication Service Stopped Replication
What is Strict Replication Consistency
The replication operation failed because of a schema mismatch between the servers involved
Troubleshooting ad replication error 8418 the replication operation failed because of a schema mismatch between the servers
How to export replication information in txt file
Repadmin Replsummary
Enabling the outbound replication
Disabling and enabling replication on schema master domain controller
How to enable strict replication consistency
How to prevent lingering objects replication in active directory
AD replication process overview
How to force active directory replication
Change notification in replication process
How to check replication partner for a specific domain controller
dcdiag test replications
Guys please don’t forget to like and share the post.Also join our WindowsTechno Community and where you can post your queries/doubts and our experts will address them .
You can also share the feedback on below windows techno email id.
If you have any questions feel free to contact us on admin@windowstechno.com also follow us on facebook@windowstechno to get updates about new blog posts.